The economics of temporization
Matt Bynum, DDS
While temporization is a necessary adjunct to restorative dentistry, it is a loss leader in time and productivity if not performed expediently and accurately. With the undue stress of overhead increases from material advancements and expense, it is critical to make this step in the restorative process profitable. Really, the only way to profit is to use cheaper materials or become faster by being accurate. Using accurate diagnostics and preparation materials allows the fabrication and resulting temporary final product to be efficient and profitable.
To the detriment of the treating dentist, using improper diagnostic techniques when taking impressions, pouring study models, and using material results in increased chair time and frustration. This does not have to be the case. Accepting some compromise in this process will result in something "we can make work," but taking time in the beginning to gain proper diagnostics will yield a better and more profitable product. The following details a veneer temporization technique illustrating tips and pitfalls that can make or break your result and profitability.
Initial impression
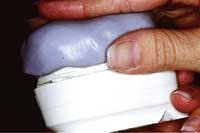
The initial diagnostic records will be the catalyst for both speed and success. This begins with the initial impression for study models. Material selection for any type of impression varies from alginate to polyvinyl siloxane, or PVS. While alginate is definitely cheaper than the more permanent impression materials, it has limitations that make it an improper material for our technique. While most auxiliaries and team members can make an alginate impression, the proper landmarks either are not captured or are not captured in enough detail. For most cosmetic cases, two study models will be needed — one for initial records and consultation, and the other for the diagnostic wax-up. Because of the physical properties of alginate, the accuracy of multiple pours is questionable. I recommend a PVS, monophase, or medium-bodied tray material. PVS is more expensive than alginate, but the accuracy and detail that can be produced in multiple PVS pours outweigh the accuracy need for multiple impressions and chair time from alginate. This initial impression is where we begin our quest for accuracy and expediency or accept compromises that will result in this process of temporization.
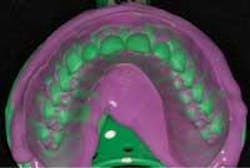
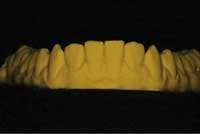
In the initial impression, you want to capture as much anatomical depth and as many soft-tissue landmarks as possible (Fig. 1). Your impression should extend beyond the gum line to allow room for temporary stent fabrication. With impression in hand, the study cast and working model can be made.
Pitfalls
1) Using the wrong material will result in poor definition and duplication. The result is an altered image of what you are really working with.
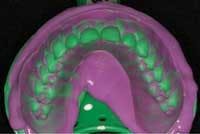
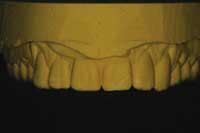
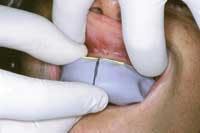
2) The other huge pitfall to avoid is not capturing enough information. Improper technique or too much time prior to seating the tray will result in material drag (Fig. 2) or slumping. As detailed, we need as much soft tissue as possible. As we begin to compromise on the standards, we should hold true to the impression result. We find ourselves working around what is not perfect. The impression is the first step in a line of possible compromises that will increase time in the chair and the end result.
Study cast and working model
A quality diagnostic study model and more important working model will be made from the impression. The detail reproduced in the model is important. Accurate anatomical depth and soft-tissue landmarks provide the template and allow for minimal movement of the temporary matrix. We assume all detail is captured in the impression. Flawless pouring of that impression is key. Voids and imperfections are counterproductive to the end result, as is poor model trimming.
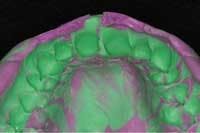
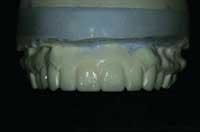
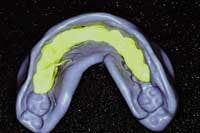
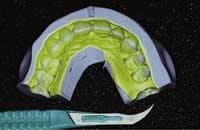
Once the model is poured, as much precision and care in trimming should be taken as in the making of the impression. Again, auxiliaries and team members often will be the ones to trim the model, so it is important for all who will be trimming the model to understand the importance of this step. In the process of model trimming, as much detail as possible should be left without having way too much excess and flash around. A minimum of 6 millimeters to 8 millimeters of soft tissue should extend beyond the cervical portions of the teeth (Fig. 3).
Remember, the more soft tissue available for "stops" as we seat the temporary matrix, the less adjustment will be required as the restorations fit with near precision. Once the models are poured and trimmed, it is time for the diagnostic wax-up.
Pitfalls
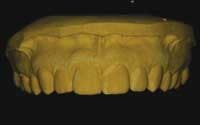
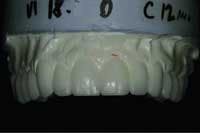
1) Over-trimming the working model will result in decreased surface area and anatomical landmarks (Fig. 4). The end result is potential matrix movement while placing it over the teeth for final temporization.
2) Another pitfall would be poor capture in the impression leaving positive blebs and voids throughout the model once it is poured (Fig. 5). "Guesstimating" where anything is going to finish and relieving areas where you think they should really be will result only in ill-fitting matrices and poorly fitting temporaries.
Diagnostic wax-up
The study model is sent to the technician. Through the integral communication efforts between the dentist and the technician, information and direction are provided to modify the model as needed to allow for proper shape, contour, and symmetry. This is where the communication between the dentist and the ceramist begins to be crucial.
For example, if gingival re-contouring will enhance the desired look of the case, it must be relayed to the technician that the gingival height of contour on tooth No. 8 needs to be raised 1.5 millimeters to allow for proper height-to-width ratios. Basically, the model work is prepared as if it were the actual patient sitting in front of the technician, only he or she has been turned to stone.
Adjustments follow the treating dentist's instructions. Wax is placed over the prepared model work and sculpted to resemble what the final smile and tooth form are to be. This is the diagnostic wax-up (Fig. 6).
From here, an impression of the diagnostic wax-up will be made using some form of accurate, pliable, and longer-lasting impression material such as a monophase or putty PVS. This is what will be known as the "temporary stent" or "matrix."
Pitfalls
1) Over-reduction of the model work inevitably will result in "show through" or thinness of the temporary material, as the tooth cannot be prepared as far as has been done on the model. Somewhere in the middle of that tooth lies the pulp.
2) Another pitfall to avoid is the guesstimate made by the technician when adjusting tissue heights. Poor anatomical landmarks will result in the technician adjusting the model work which will not duplicate existing tissue (Fig. 7). As the treating dentist and clinician, it is your responsibility to inform the technician how much and where you will be re-contouring the tissue levels. Again, communication with your technician could not be more crucial. He or she needs to know your desired end result. You know the patient, you know the parameters, and you know the limitations — not the technician.
Temporary stent or matrix or both
As mentioned, our next step is to fabricate a matrix to capture the exacting details of the diagnostic wax-up so we can duplicate the characteristics in the mouth. Again, this is a critical step that often loses translation of definition and duplication. It is imperative that you use some sort of pliable or semi-flexible material so that the removal of the matrix in the mouth is easy. Should a less-forgiving material be used, such as a polyether, the result would be inadvertent removal of the temporaries or breakage upon removal of the matrix.
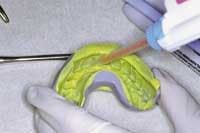
This is a two-step process. As the putty material sets to semi-rigidity, it forms a semi-accurate impression of the diagnostic wax-up (Fig. 8). ("Semi-accurate" because the definition of this first material is imperfect as it only serves as a medium for placement of a more accurate and fluid-impression material such as a light-bodied PVS.) This re-line material is placed inside the putty matrix and then seated directly over the diagnostic wax-up (Fig. 9) and left to harden while capturing complete accuracy of what the final outcome will look like. This final re-lined matrix is what will hold the temporary bis-acrylic material that will become the temporary restorations (Fig 10).
Pitfalls
1) Accuracy is the key. Voids in the matrix will result in positive blebs of material, resulting in more clean-up and headache.
2) Another area to avoid is the actual size of the matrix. Oftentimes when the laboratory fabricates the stent, it is a little on the big side. Remember, this has to fit in the patient's mouth without interference. If the tray is too big, either it will be compressed in areas it should not be — resulting in distortion — or it will not be able to fully seat in the mouth, resulting in a temporary that is elongated or canted. Make sure the matrix can be seated fully without interference.
Temporary restorations
Materials available for temporary fabrication are endless. Anything from standard acrylic to even composite resin may be used. I prefer material that is strong and durable, aesthetic-looking, and has a relatively fast set time with little dimensional change and exothermic reaction. My choice is bis-acrylic. Handling with such material is easy, clean-up is easy, and aesthetics are very good. Fabrication with this technique is done in as little as three to five minutes.
Inside the stent or matrix, place your temporary material in the very bottom of the matrix (Fig 11). Be sure to place the material everywhere the tooth has been prepared and everywhere you want the material to end up. The tray is seated in the mouth over the prepared teeth and left to set.
Once the material is set, the matrix is removed and the excess material is removed. Clean-up is essentially over when the matrix is removed. If everything has been done as detailed, the excess material literally should be minimal to none. It is here that a realization of time and productivity loss are found.
Pitfalls
1) Using too little material will result in incomplete areas of coverage by the material. Too much material will result in possibly too much flash. However, should all care be taken to maintain complete accuracy, there can never be too much material as it would all be expressed beyond what the matrix has replicated.
2) Another pitfall to avoid is placing material just short of the internal depth of the matrix. By dragging or incompletely pushing the material into the tray, more air will be trapped, and more voids will be created at the incisal edges and angles, resulting in more repair time and inconsistency in material and possibly shade.
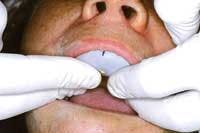
3) Also avoid incomplete seating of the matrix and too much compression and pressure of the matrix. Either way, the result will be distortion and increased repair, as well as improper bite relationship and probable canting of the arch. The matrix must be seated fully, with steady, even pressure to ensure no such problems (Figs. 12 and 13).
Characterization
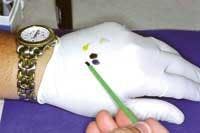
This aspect of temporization has no pitfalls! Using external stain modifiers or resin tints (Fig. 14), the dentist may turn what seems so systematic into something that resembles art. Placing color enhancements to replicate incisal translucency, halo, gingival blending, and unique characterization gives the temporaries a realistic look. This virtual permanence allows the patient to view aspects of future porcelain veneers and determine their desirability. The true benefit — outside of patient aesthetics — is the marketing that follows. Patients in temporaries are as confident and assured as the day after having real veneers placed.
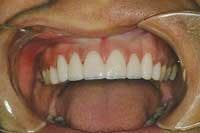
During this treatment phase, your patient's friends, relatives, and even strangers see results. The temporaries are lifelike and beautiful (Fig. 15). When temporary restorations look as good as — and definitely better than — most permanent restorations, others wonder what it might be like to wear a similar smile. Imagine having referrals as a result of your temporaries. It's true; it happens. This is an immediate positive impact on an office's bottom line.
This sequence to temporary fabrication has many intricate steps contained within each big step. While I have detailed basic steps to fabrication, this is not a pure, clinically oriented article. The business end of temporization is simple. Monetary loss attributed to time loss is correlated directly and great in measure. The less accurate any one step in this process, the less accurate the final product. The result is increased chair time fixing what should be effortless and efficient. As they say, "Time is money," and it is imperative that the least amount of time be spent on fabrication and clean-up. Place slightly more attention to the detail involved in the early stages of the process.
With these advanced techniques and procedures for temporization, we can focus more of our attention and detail on other productive procedures or patients or both and not on fabricating temporaries which look less appealing than this method and take more time to fabricate. These are not the days of single-tooth temporization as so many have been taught and still conduct in their offices. Simplification of this process allows for a different end result. Temporization can be a profitable aspect of your practice if addressed according to the detailed chain of events. If not performed properly, temporization also can be one of the most grueling areas of profit loss and frustration we have in our practices.
Will you allow yourself the possibility of increased productivity and fun, or will you fight the possibilities and continue on the path of frustration?
