Exceptional results through contact management
by Brad Durham, DMD
Cosmetic dentistry changes lives! A great result will lead to a positive change in a patient’s life, and a poor result can lead to a negative change in the dentist’s life. Wouldn’t it be great to have a great result every time? Here’s some “out-of-the-box thinking” that will improve your veneer success.
Question: If you have accurate impressions, accurate mounted models, a stable bite, and excellent provisionals, why do veneers seem to fit differently in the mouth than they do on the model? The problem is typically related to laboratory-produced tight interproximal contacts that manifest during cementation. One tight contact produces a domino effect, as each sequential restoration develops an even tighter contact and the error compounds.
Correcting laboratory issues may be as easy as switching to the best laboratory and materials available. When the case comes back to you, check the contacts. On a solid model, pull the thinnest mylar occlusal ribbon through the contacts. If the mylar rips, the contact is too tight. If you feel no friction, the contact is open. If there is slight friction, with light ink being transferred, the contacts are correct. Essentially, proper interproximal contacts do not touch, but are open a few microns!
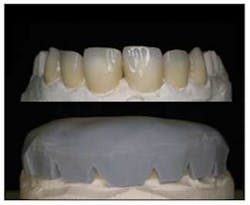
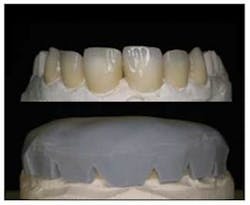
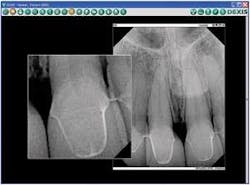
Seating displacement and incomplete seating of the restorations will lead to misalignment, open margins, and/or tight contacts. To minimize or eliminate seating issues, use a cementation index to carry all of the restorations to the mouth at once in the same alignment as on the model. Once the restorations are stabilized in the mouth, take radiographs for confirmation. The ease, speed, and magnification of digital X-rays are perfect for this task.
To make an index, correctly adjust the restorations’ contacts on the solid model. Apply a thin layer of autocure composite-based provisional material over the incisal edges to lock them into position. Using magnification, confirm the restorations’ alignment. Then place a thin layer of polyvinyl putty over the entire body of the restorations. After it sets, trim back this material with a surgical scalpel, removing a “V-shaped” section from the mid-facial of each restoration, then confirm proper positioning again. Relieve the putty to correspond with “soft tissue” areas removed by the lab on the solid model.
Moving to the mouth, visually confirm fit of the restorations individually, collectively with the index, and radiographically. Using your preferred technique, prepare all of the teeth and restorations for cementation. Use the index to deliver all of the restorations (with cement) to the prepared teeth at once. Since restorations go to the mouth in the same alignment as on the model, and the cement is not cured until all of the restorations are totally seated, they “snuggle down” together for perfect contacts and alignment. Simply wipe away the cement from the mid-facial “V,” tack with the curing light, remove the index, visually confirm proper alignment, and perfectly dry soft tissue (no bleeding), then clean and cure.
Caution! This is a very advanced procedure. I recommend that you fully understand the concept before beginning with single units and moving on to multiples. You’ll find it faster and more accurate than the one-at-a-time method. Using an index, I’ve personally cemented thousands of restorations with great success and time savings. I can easily cement a veneer case in minutes and a full mouth in less than an hour. More happy patients, as well as more predictable and profitable veneers, can be yours through better contact management.Dr. Brad Durham has practiced dentistry for 25 years with an emphasis on the treatment of head, neck, and facial pain, dental cosmetics, and complex dental reconstruction. His practice combines art, science, and technology with personalized care. He is a clinical and featured instructor at the Las Vegas Institute, and was the first in the world to earn the LVI Mastership award for esthetic reconstruction. Dr. Durham teaches a series of courses titled “The Niche Practice” at LVI and his home in Savannah, Ga. Contact him at [email protected] and www.nichepractice.com.


