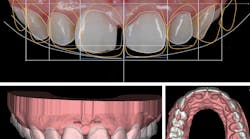
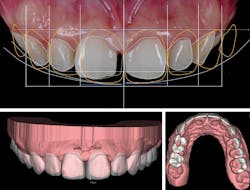
Digital Smile Design app by Christian Coachman, DDS, CDT
There are certainly fads in dentistry. Almost as quickly as some of them come in, they’re gone. We’ve probably all been suckered at least once during our careers.
But one thing that has popped up over the last couple of years is here to stay (I think). I believe Digital Smile Design will change the way we diagnose and plan comprehensive treatment, approach esthetic cases, and communicate with our patients.
Back in January, I was fortunate enough to take an all-day course with Christian Coachman, DDS, CDT, on the Digital Smile Design concept and app. To summarize that course, the future is here, and it is here to stay.
I’ve had a lot of colleagues ask me, with some confusion, “Exactly what is Digital Smile Design?” That’s a great question because it has evolved over the last few years. What was once simply a concept has transformed into a full-fledged app with integrated support from the lab side.
The Digital Smile Design app, which can be used with an iPhone or iPad, is free to download from the Apple App Store. A subscription is required for using the full app, and there are different subscription plans based on how frequently you think you’ll use Digital Smile Design. I’m currently on a plan that gives me three cases for $69 total. There is also a plan that offers unlimited cases for a year. I decided to try it out with the three cases first before purchasing the full-year plan.
Using the app, you take a series of photographs and videos of the patient. You can also upload an STL file from an intraoral scanner and a DICOM file from a CBCT scanner. Next, you mark different landmarks on the photos. Then virtual teeth are inserted into the smile photographs that you can manipulate any way you want. You can change the shape, size, color, and position of the teeth in the smile.
The app is easy to use. The first smile design I did took around half an hour. With practice, the time I spent on subsequent designs reduced drastically. The end result for the patient is a chairside photograph mock-up of what comprehensive esthetic dentistry could do for them.
While that is cool, it is not unique. What sets Digital Smile Design apart is what comes next.
Using the 2-D data, along with a 3-D scan and CBCT (if implants are part of the plan), you can have a certified lab fabricate a 3-D model and a polyvinyl siloxane (PVS) matrix. This PVS matrix is used along with bis-GMA provisional material to make a motivational mock-up of the mouth so the patient can visualize what is possible. Dr. Coachman is adamant that a mirror should not be given to the patient at this point. Go to your impromptu photo studio and record a video of the patient talking and laughing with the mockup in place. Put this video on the TV in your operatory to let the patient see what you can do for them. At this point, your patient will be mesmerized by the results, and your chances of closing the case go way up.
Some time and lab expenses are involved with this, but as I mentioned, it will take less time with practice. You will get to the point where you can create your 2-D rendering within minutes. The lab fee for a basic case is reasonable. If your case acceptance rate goes up, this system will be worth your time and lab money.
I think Digital Smile Design can revolutionize the comprehensive esthetic part of your practice. Get to one of Dr. Coachman’s courses and start using Digital Smile Design. Two-run home run for Dr. Coachman!
Rite-Lite 2 shade-matching light by AdDent Inc.
A few years ago, I got a phone call, the type many of us have received at some point during our careers. It was after hours, of course, because this type of phone call always comes after hours. Marie had been a patient of mine for a few years. She’d had trauma on No. 9 during her teenage years. The crown had been done in the late ‘90s with what was available at the time: endo, a post and core, and a porcelain-fused-to-metal (PFM) crown. It looked OK—as in borderline average, nothing to brag about.
When she called me to say the crown had come off, I knew exactly what that meant. It meant the tooth had broken off at the gumline. We decided the best course of action was extraction and an implant. After months of healing and provisionals, it was time for the final restoration. When it came back from the lab, it was close shadewise—close but not quite perfect. I took some photos and sent it back. It came back closer but still not quite perfect. This happened four more times until it was close enough that we all gave up. That sounds really depressing now that I recount it, but that is how it went down. Sad.
The issue with shade selection is that the light that we choose shades in is variable and different from the light that our ceramists work in. Overhead fluorescent light, incandescent light, and natural light all make colors look different. Cutting through all of this can be difficult.
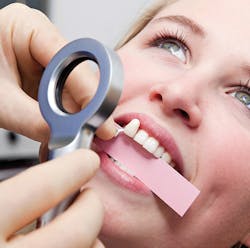
It might not have been such a sad ending with Marie if I’d had the Rite-Lite 2 by AdDent Inc. The Rite-Lite 2 is a handheld wand with a circle on the end. Inside that circle are LED lights that are color-corrected to help you pick the right shade.
The Rite-Lite 2 has three different modes. The first mode is color-corrected light at 5,500 degrees Kelvin. The second mode is incandescent light at 3,200 degrees Kelvin. This mimics average indoor lighting. The last mode is ambient light at 3,900 degrees Kelvin. This mimics average room light and natural sunlight.
Using the three different modes is simple. Use the first mode, the color-corrected mode, to pick a shade. Once you’ve chosen, check the shade with the other two modes. The correct shade will match in all three modes. Once you find the shade that does, you’re set. Send it to your technician!
The Rite-Lite 2 uses a high color rendering index (CRI) for color accuracy. The CRI is a measure of how accurately an artificial light source reveals an object’s true color. With a high CRI score, the Rite-Lite 2 can help offset all those lighting problems we discussed earlier. If the Rite-Lite 2 can save you from one remake a year, it pays for itself! Single smacked over the shortstop’s head for AdDent’s Rite-Lite 2!
I have always been a fan of DSLR cameras in dentistry. The DSLR camera is a huge part of my practice. We use it all the time! Of course, there is a bit of a price to pay for that: time and frustration. I do not have a team of dual-trained dental professionals who are also professional photographers. Using a DSLR camera means using mirrors and retractors, and even then, sometimes we struggle to get the photos we need.
I have been skeptical of intraoral cameras over the years. My biggest complaint was the financial investment required—traditionally thousands and thousands of dollars—for subpar images. Now you can get a great intraoral camera for a fraction of the price and get good images of those hard-to-reach places you can’t get with a DSLR camera!
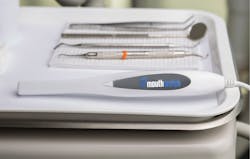
MouthWatch intraoral cameras are USB-connected cameras that work with a plethora of software systems. Heck, I have MacPractice. Not many cameras work with my system, but MouthWatch does! Setup was quick and easy—virtually plug and play. We were taking images in minutes.
The images it captures are clear and of good quality. They don’t rival my DSLR images, but that’s not the point. We use the MouthWatch to capture quick images of single teeth that might be difficult to get with the DSLR. For that use, this camera has been invaluable.
Price is always something to consider with equipment purchases. That is a huge plus in MouthWatch’s favor. A single camera is less than $300. A three pack is less than $800. That is an amazing value for a product that consistently works well. You could easily equip all your hygiene operatories for under $1,000. Unreal!
The support I have gotten from MouthWatch has been great too, although I haven’t needed much. I got a simple walkthrough on setting the cameras up, and everything has worked great since. I have been impressed with how quickly my hygienists have caught on to using the MouthWatch and how reliable the cameras have been. If you are looking to add an intraoral camera to your office without breaking the bank, the MouthWatch is it. Line-drive single back up the middle for MouthWatch!
Joshua Austin, DDS, MAGD


